Documents available to your site visitors should be stored in a Blackboard Organization space. A permanent URL is created for each file there, and you can control the permissions guests have when accessing the file.
This information and clip augment the Blackboard Upload and Permissions Management Guide created by Blackboard's managing department, Mason ITS department. Before you begin, make sure you have access to your unit or department's Blackboard organization space. Do not put documents in a personal Blackboard space. If you need an Organizational Blackboard space, contact ITS Blackboard support.
Uploading your File
To start, you'll need to log into Blackboard. In the navigation (left hand side on desktop, top left dropdown on mobile), click "Organizations" then find your organization in particular. This should open your organization's Blackboard space. There should be a grey sidebar on the left hand side of the window (it collapses with an arrow on mobile) that displays the contents of your organization. Click the section labeled "Content Collection" and then the top option. This should bring you to your organization's Blackboard storage space. The ability to upload a file should be one of the first buttons on the page.
Setting Permissions
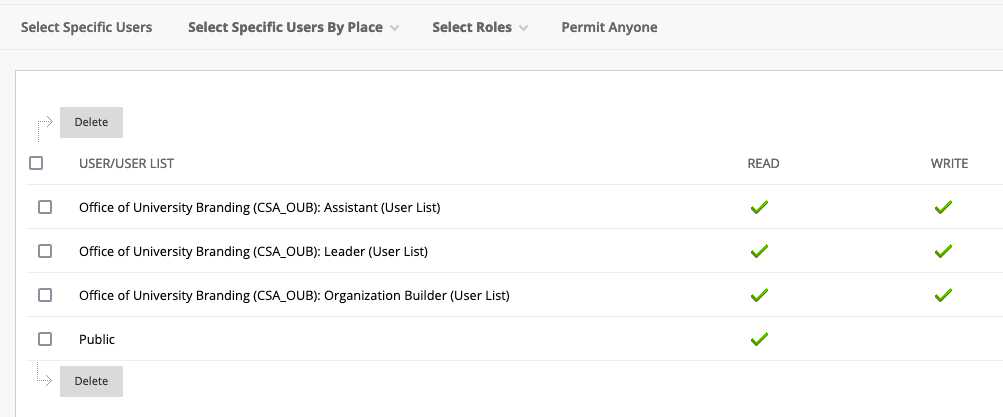
If you have not already, upload your document to the folder you wish it to reside in. From the folder view, right-click on the file you uploaded and select "Permissions." This will bring you to the general permissions screen.
Different folders may have different permissions levels. What you are looking for is to have "public" as a listed option, with at least "read" indicated as checked. If you do not see "public" listed, select "permit anyone" at the top of the table. Ensure "read" is selected and save.
Getting Permanent URL
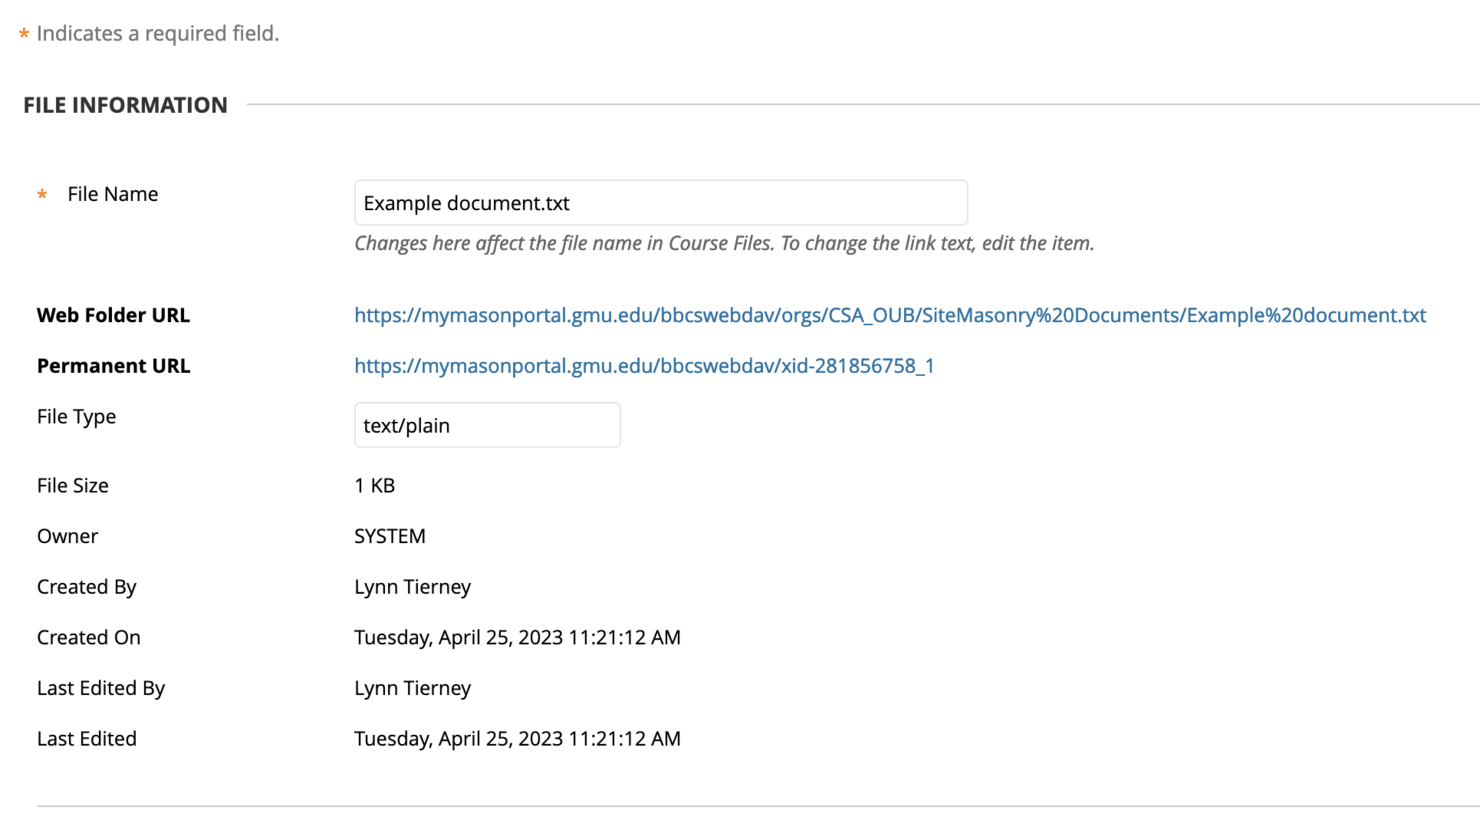
Once you are sure the permissions are correct, you can get a permanent link to your document for the public to use. From the folder view, right click on the file you want the link for and select "edit settings." On that page, you should see two URLs, one of which is labeled as permanent. This is the URL you need to copy and use on your site.
Looking for a quick video showing how to get the permanent link? Check below.
Related News
- April 1, 2025
- December 11, 2024
- November 12, 2024
- October 25, 2024
- October 2, 2024